Does your child love dressing up and playing make-believe? This no-sew fantasy phoenix kids costume is a very fun accessory for going on adventures. Learn how I made this costume for my daughter using sheer red fabric, strips of tulle, and a hot glue gun.
The Phoenix is an amazing mythological creature found in stories such as Harry Potter and Disney’s live-action MULAN. The phoenix inspires hope, courage, and innovation. At the end of its life, the phoenix is reborn by rising from the ashes. Whatever this metaphor means to you, there’s certainly always reasons for hope and perseverance in our own lives.
I think the idea behind the mythological phoenix is pretty awesome!
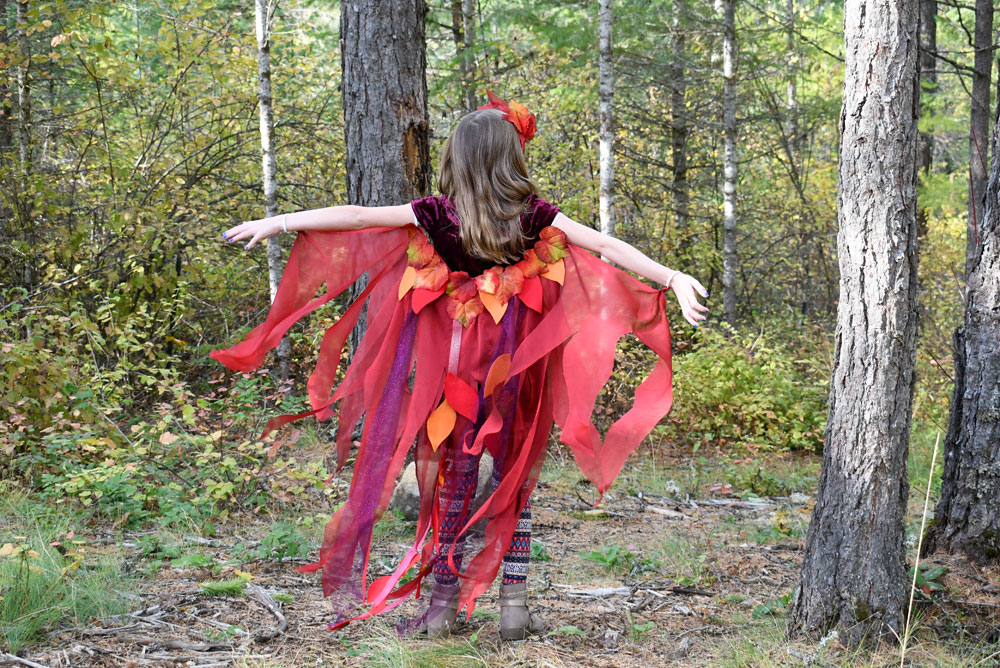
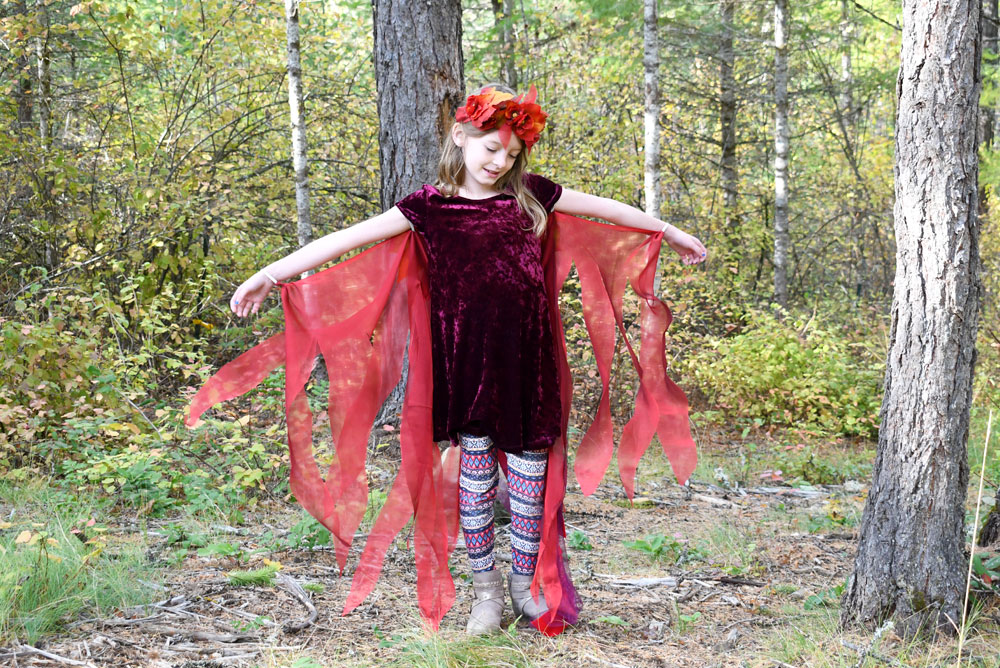
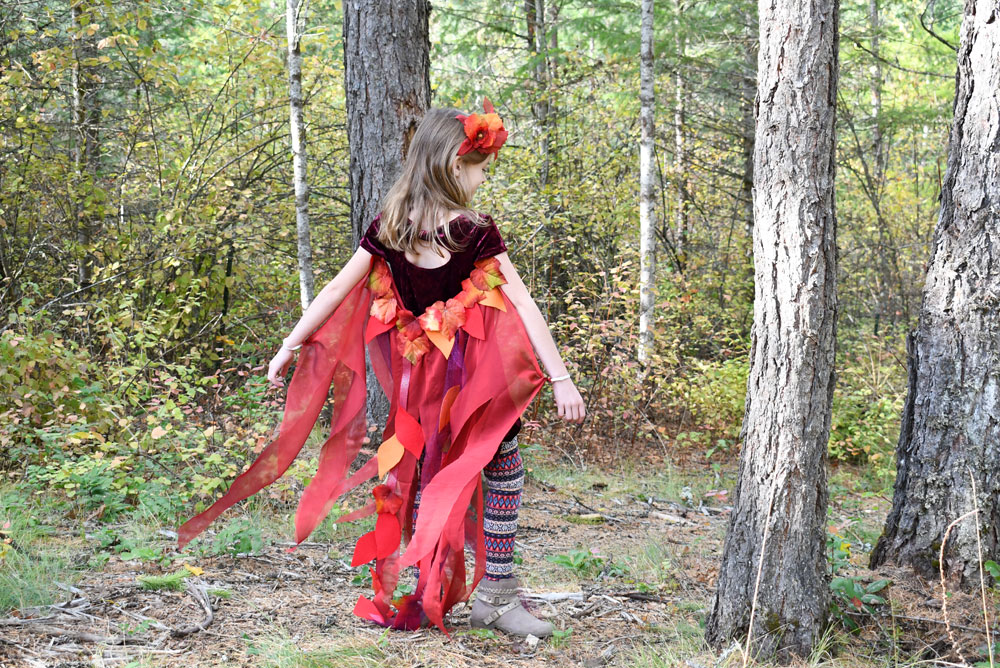
For this costume, My daughter and I worked together to create the phoenix’s wings and tail using flowing strips of colored fabric to represent feathers. We loved how this fantasy dress up phoenix costume turned out!
DIY Phoenix Kids Costume
To create the fiery spark represented by the phoenix, I chose to use lots of warm colors in this costume. Additionally, I mixed varying lengths of materials to give the phoenix wings and tail a flowing design.
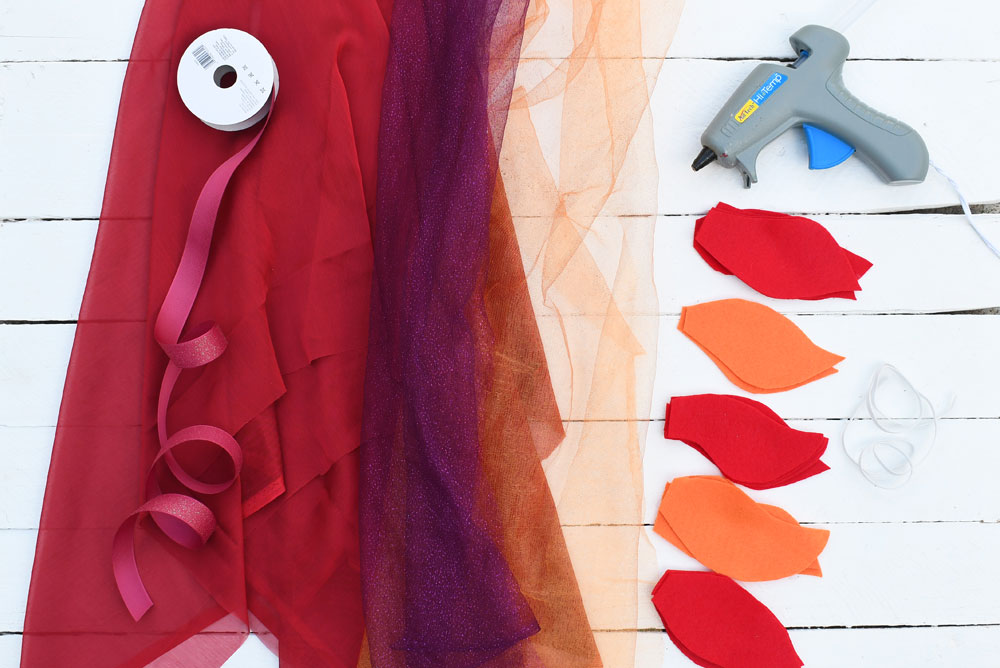
To make this costume, you will likely use different materials than I did, but you could follow the same general design. You will need a variety of sheer fabric, ribbon, warm colors of felt, tulle, and artificial maple leaves. You will also need 1/4 inch wide elastic, scissors, and a hot glue gun.
Materials:
- sheer red fabric
- red ribbon
- glittery tulle (warm colors)
- red & orange felt
- 1/4 inch wide elastic
- scissors
- hot glue gun
- maple leaf garland
Create the Tail & Wings – Phoenix Kids Costume
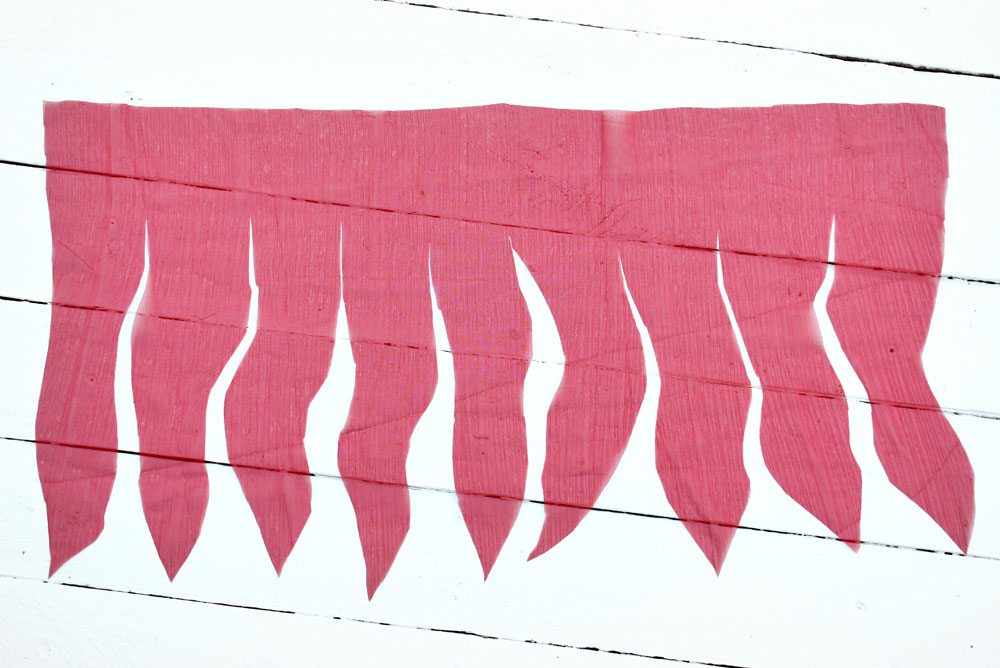
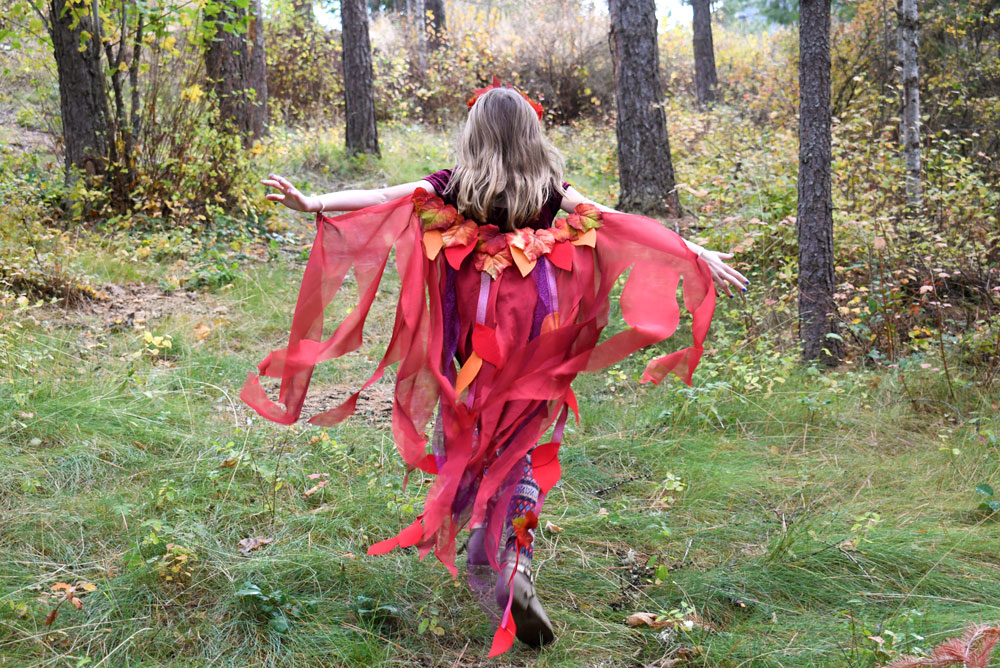
First, make the fantasy phoenix wings by cutting a length of fabric into connected strips. Begin by measuring the arm span of your child and cut the fabric long enough to reach from wrist to wrist. The fabric I used to make the phoenix wings for my 8-year-old daughter was 45 in. long by 24 in. wide.
Cut the fabric widthwise into strips using wavy lines. Leave 6 inches uncut at the top of the fabric to keep the strips connected together. Cut the loose ends of the strips into points. The wavy cut lines will give the wings a fire-inspired design.
Next, cut the phoenix tail using the same method. I used a long piece of fabric and cut the strips lengthwise. The tail should be narrower than the wings, but extend past the bottom of the wings, about twice as long. Attach the tail to the wings at the back using the hot glue gun. You can use parchment paper as a workspace, which works well. Apply a line of hot glue, and use a piece of parchment paper to press the fabric layers together, to prevent burning your fingers.
You can also sew the phoenix tail onto the wings, if you want to turn this no-sew tutorial into a sewing project!
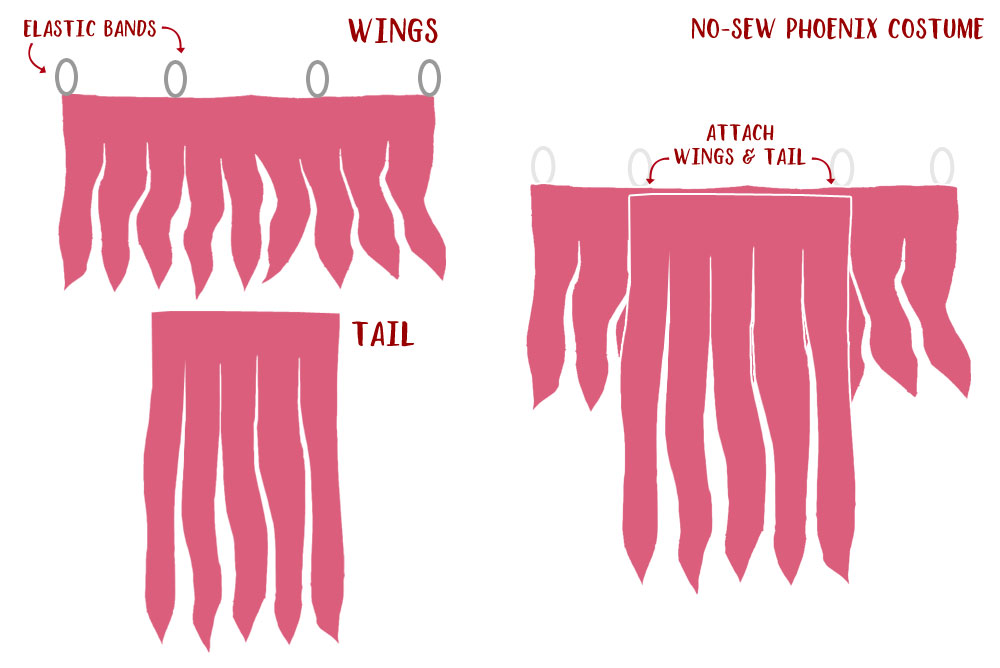
Add Elastic Bands
To add the elastic bands, cut 4 lengths of 1/4 inch wide elastic that are long enough to go around your child’s arms and wrists. Hot glue the ends together to make elastic circles. Using the hot glue gun, attach the elastic bands along the top of the phoenix wingspan. Attach two bands at the ends of the wings to go around your child’s wrists, and two bands spaced out along the wingspan to go around your child’s arms near the shoulders. Make sure to use enough hot glue to secure the elastic bands in place on the fabric.
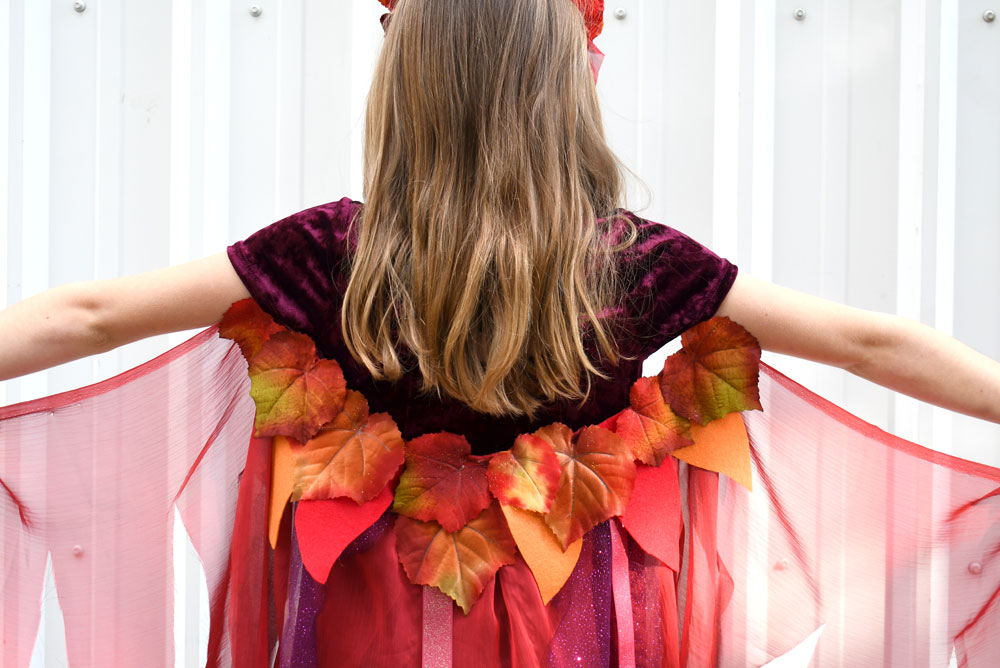
Decorate the Wings – Phoenix Kids Costume
Once you have the phoenix tail attached to the wings, it’s time to decorate! You can use long strips of tulle and ribbon in warm colors to embellish the tail. Cut out leaf and flame shaped pieces of felt and hot glue the pieces onto the ribbon and along the top of the wings. Finally, you can glue on artificial maple leaves in vibrant colors. Be as creative as you’d like with this no-sew DIY phoenix kids costume!
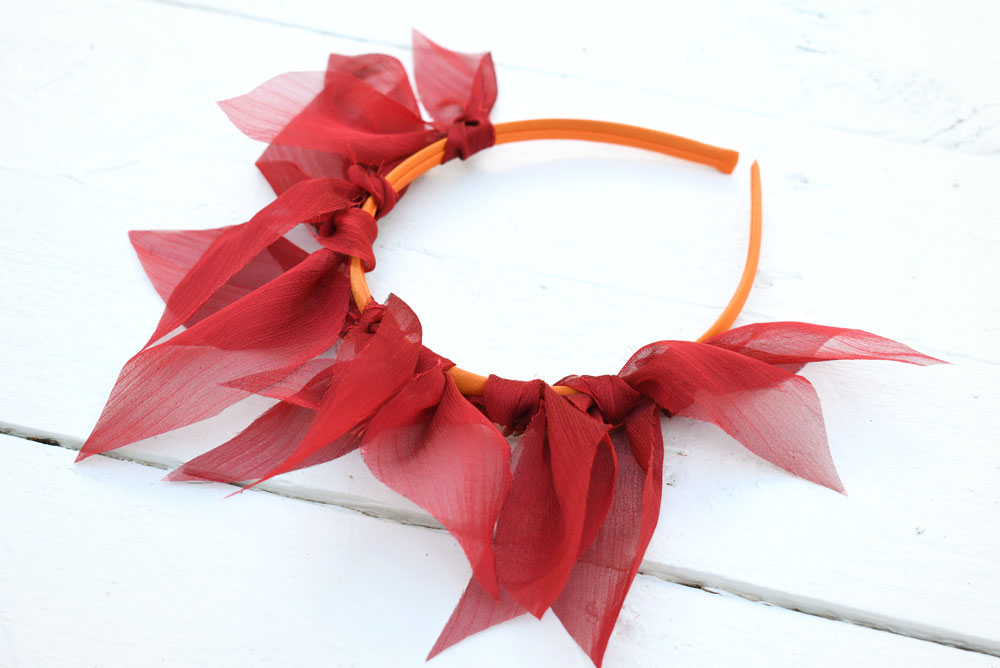
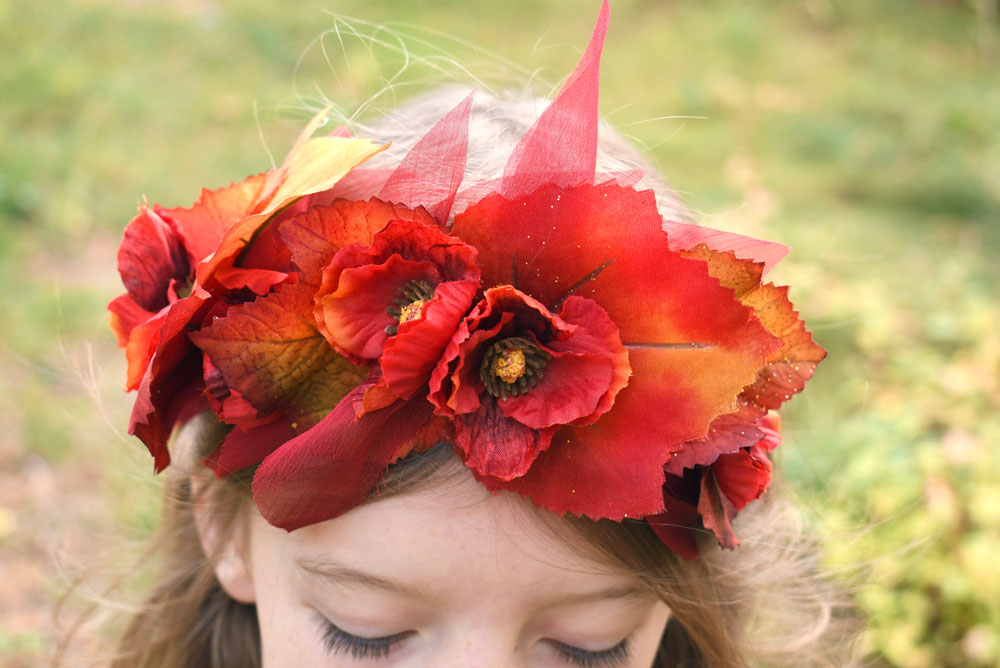
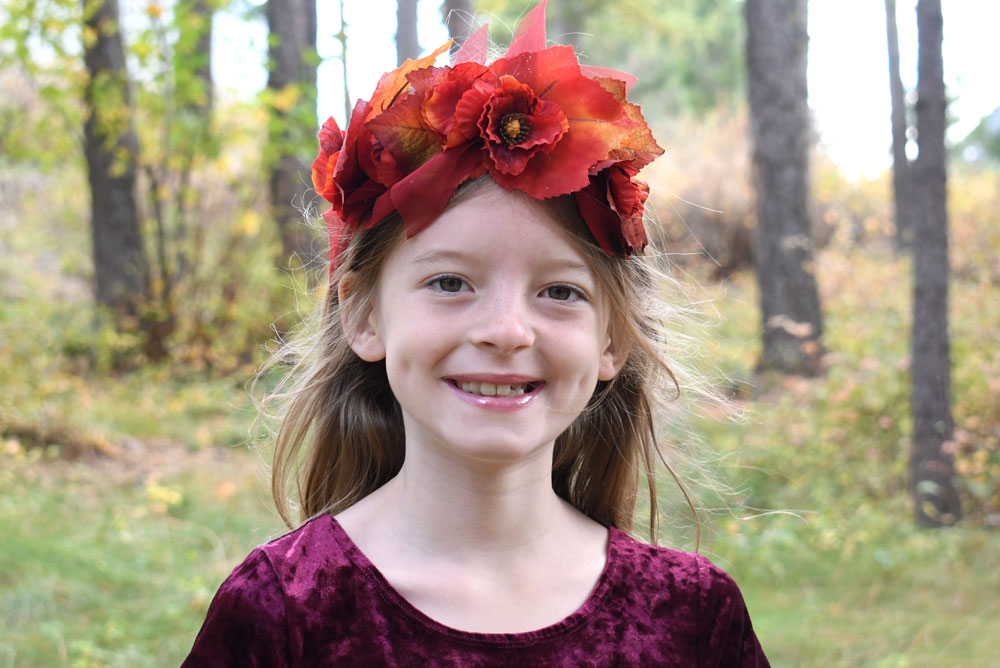
Make a Matching Headband
Finally, you can design a matching phoenix-inspired headband using some of the same materials you used to make the wings and tail. Use a plain headband or length of elastic as the base. Tie on fabric, attach leaves, fall flowers, foliage-inspired accents and more. Use a hot glue gun to secure all the accents in place.
Make this DIY fantasy crown look fiery and vibrant with bright sheer fabric, tulle and artificial leaves.

Most importantly, have fun! This is a crafty project you can work on with your kid. My daughter helped design this fantasy kids phoenix costume and watched me do the finer detailing. After all, it takes some practice to effectively use a hot glue gun! She was absolutely thrilled with how this fun DIY kids phoenix costume came together in the end.
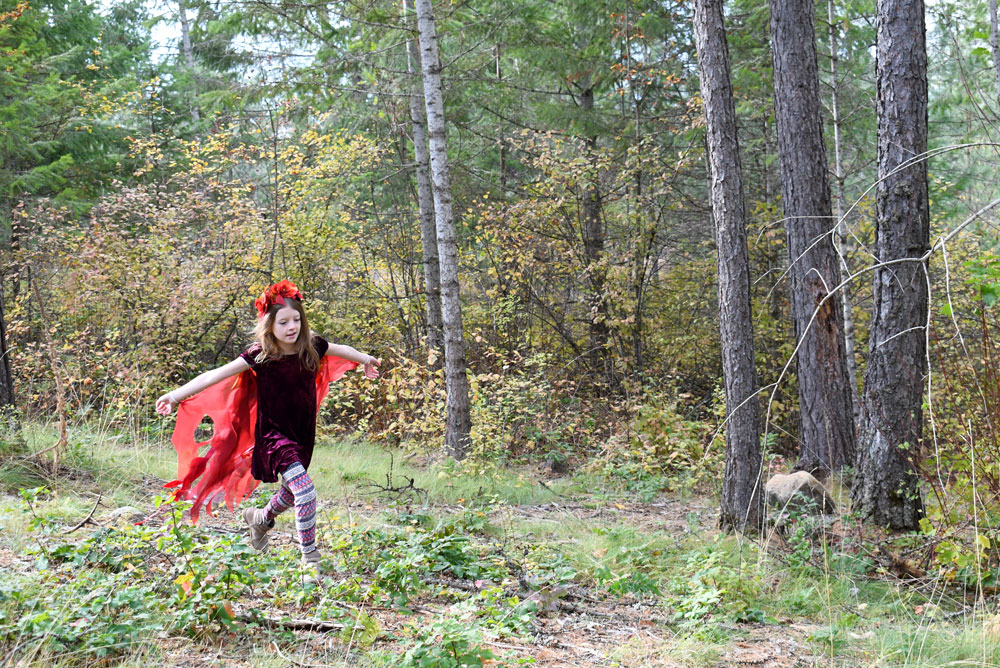
Pair these fiery wings with a simple tunic and leggings, and your child will be ready to fly! Overall, this costume was very fun to make and warm to wear while trick-or-treating.
Did you enjoy this post? Find more creative activities for kids on our Kids Activities page!

Hi, I’m Katie! I’m a homeschool mom who’s traveling the world with my husband and 4 kids. We raised our family in North Idaho and currently live in Mérida, Mexico. I love Jesus, coffee, creative projects, photography, and traveling. I hope you enjoy our creative ideas and family adventures!